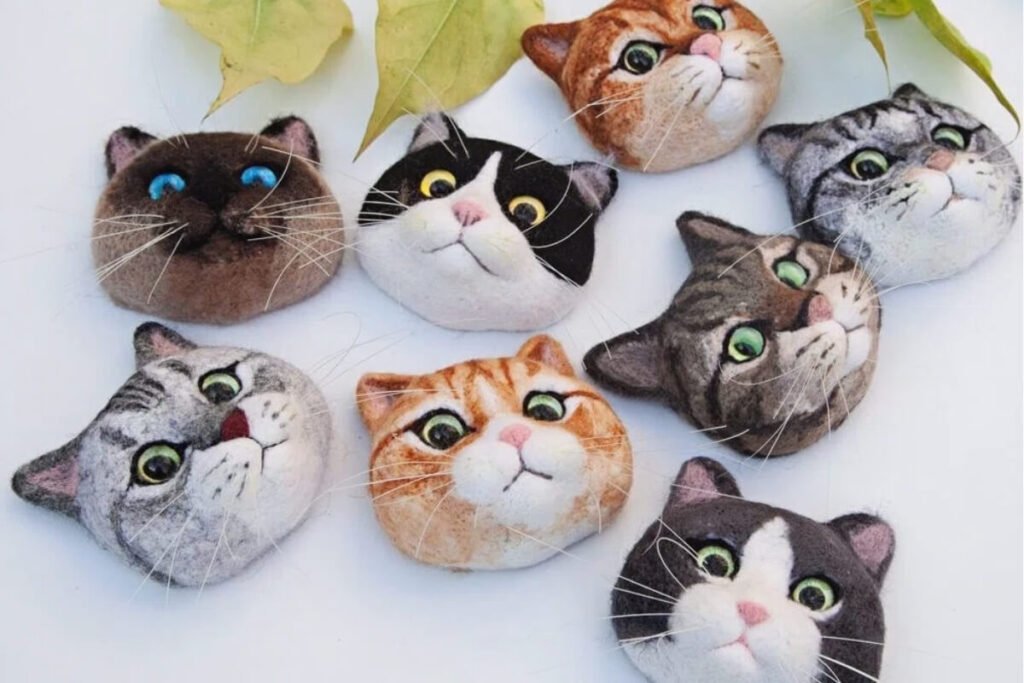
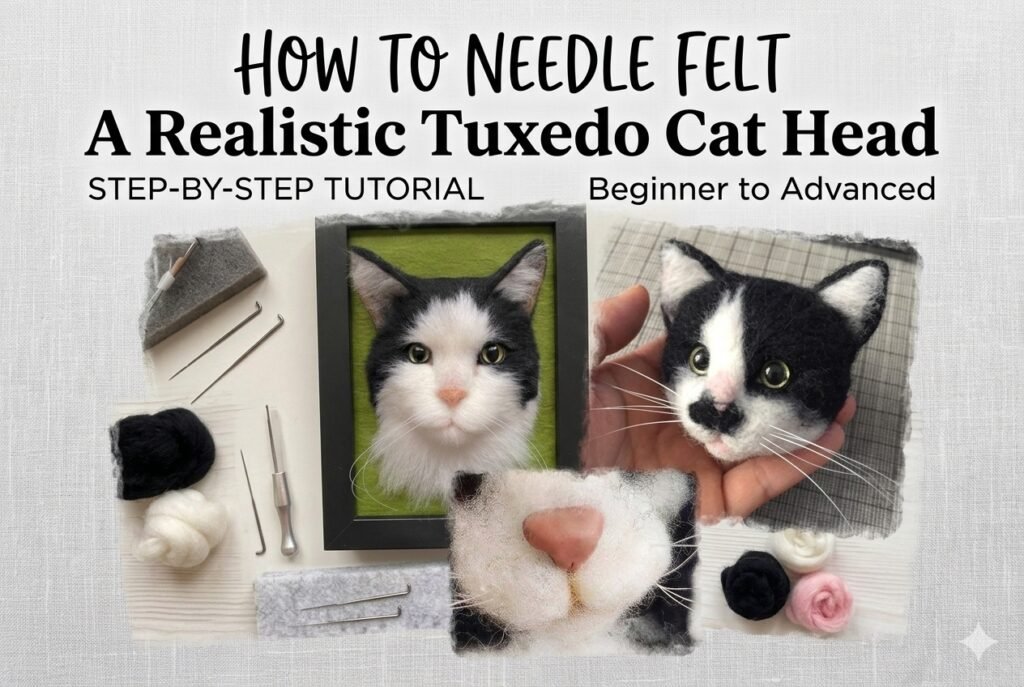
There is something special about turning a little bundle of wool into a cat that actually looks like it has a personality. If you love cats and enjoy handmade crafts, learning how to needle felt a realistic tuxedo cat head is a fun project that can be surprisingly rewarding.
Tuxedo cats are especially fun to recreate because of their distinctive black-and-white markings. The contrast between dark wool and bright white areas makes their faces instantly recognizable, but getting those markings to look natural takes a little patience.
In this guide, we’ll walk through the process of making a realistic tuxedo cat head using needle felting techniques. Whether you are a beginner building your first cat or an experienced crafter looking for a new project, these tips can help you create a cute, expressive wool cat that feels more like a tiny sculpture than a simple craft.
What Makes a Tuxedo Cat So Fun to Needle Felt?
A tuxedo cat isn’t a specific breed. The term usually describes a cat with a mostly black coat and distinctive white markings on areas such as the chest, paws, muzzle, or face. Every tuxedo cat looks a little different, which gives needle felters plenty of creative freedom.
The biggest challenge is creating a convincing facial shape while keeping the black-and-white pattern balanced. A realistic cat head is not simply a round ball of wool. It has cheeks, a forehead, a muzzle, a chin, and subtle changes in shape around the eyes and nose.
That is what makes this project so satisfying. You are not just making a black-and-white cat—you are slowly sculpting its expression and personality.
Materials You’ll Need
Before starting, gather your basic needle felting supplies. You don’t need a huge collection of tools to make your first realistic cat head.
Basic Materials
- Core wool for building the basic head shape
- Black wool roving
- White wool roving
- A small amount of pink wool for the nose
- Gray, brown, green, blue, or other colors for the eyes
- Felting needles in different sizes
- Foam felting pad or another suitable felting surface
- Small scissors
- Optional glass or plastic eyes
- Optional wire or strong thread for whiskers
If you’re just getting started, a needle felting kit for beginners can make things easier because many of the basic materials are already grouped together. Once you get comfortable with the technique, you can start experimenting with different wool colors and specialty needles.
Step 1: Build the Basic Cat Head Shape
Watch a Realistic Tuxedo Cat Needle Felting Tutorial
If you’re a visual learner, watching an experienced needle felter shape a cat can make the process much easier to understand. This tutorial from Julie’s Felted Friends focuses on creating a small realistic tuxedo cat and demonstrates the shaping and facial-detail process.
It’s especially helpful if you’re still learning how to build the basic head shape, position the facial features, and create a more lifelike cat sculpture.
Watch the tutorial before moving on to the detailed facial work:
As you watch, pay particular attention to how the basic wool shape is built before the black-and-white coat and fine fur details are added. This is a great reminder that realistic needle felting starts with good proportions rather than details alone.
Start with core wool rather than your finished black or white wool. Pull off a section of wool and loosely roll it into a ball.
Use a medium felting needle to repeatedly poke the wool. Rotate the shape frequently so you don’t accidentally create flat areas in places where you want a smooth curve.
At this stage, don’t worry about making it look like a cat yet. Think of this as creating the foundation for your sculpture.
A cat’s head is generally wider through the cheek area and slightly narrower toward the top. Keep the back of the head rounded, but begin creating a slightly flatter front where the facial features will eventually go.
Don’t Over-Felt the Core
One beginner mistake is making the entire head extremely hard at the beginning. You want the core to be firm enough to hold its shape, but you may still need to add wool and adjust the proportions later.
Leave some flexibility for building the cheeks, muzzle, forehead, and other details.
Step 2: Shape the Cheeks and Muzzle
This is where your cat head starts becoming recognizable.
Add small pieces of core wool to both sides of the face to create fuller cheeks. Felt each side gradually rather than adding a large amount of wool at once.
Next, add wool to the muzzle area. A cat’s muzzle has two subtle rounded sections on either side of the nose. These little shapes are extremely important if you want your finished sculpture to look more realistic.
Use your felting needle to carefully define the area between the muzzle and cheeks. You don’t need deep grooves. Even small changes in surface height can create convincing shadows.
Step 3: Add the Tuxedo Cat’s Black Coat
Now comes the fun part: turning your plain wool sculpture into a tuxedo cat.
Take small pieces of black wool and gently layer them over the head. Start with thin pieces rather than trying to cover everything with a thick layer at once.
Felt the black wool into the core using controlled pokes. Work slowly around the face so you don’t accidentally destroy the shape you’ve already created.
Leave the areas where you want white markings uncovered.
Creating Natural-Looking White Markings
Tuxedo cats don’t all have identical markings. Some have a narrow white stripe on the nose, while others have a wide white muzzle or a dramatic white blaze across the face.
For a more realistic result, avoid making the white markings perfectly symmetrical. Real cats often have slightly uneven patterns, and those imperfections can actually make your handmade cat look more lifelike.
For example, you could create:
- A white muzzle and chin
- A small white stripe between the eyes
- A larger white chest area
- A small white patch near one cheek
Use very thin pieces of white wool around the edges of the markings. This helps blend the colors together instead of creating an overly sharp, artificial border.
Step 4: Shape the Cat’s Ears
A realistic cat head needs expressive ears.
Build each ear separately using small amounts of core wool. Create a triangular shape, but don’t make the ears look completely flat. A little thickness gives them a more natural appearance.
Cover the outside with black wool if you’re making a classic tuxedo cat. Add a small amount of pink, gray, or pale-colored wool inside the ears.
Attach the ears to the top of the head by firmly felting the base. Check both ears from the front and side to make sure they have a similar angle.
Tip for Better Cat Ears
Don’t make the ears too large. Oversized ears can make your cat look more like a cartoon character. If you’re aiming for realism, compare the ear size with the width of your head sculpture as you work.
Step 5: Create the Eye Sockets
The eyes are probably the most important feature when you’re learning how to needle felt a realistic cat.
Before adding the eyes, gently indent two eye sockets using your felting needle. Make sure they are positioned evenly, but don’t obsess over perfect mathematical symmetry.
Cat eyes sit relatively wide apart, and the overall shape is more almond-like than perfectly round.
If you’re using wool to create the eyes, build them in layers. Start with a darker base, then add the iris color and a tiny darker or black pupil.
If you prefer a more polished finish, small craft eyes can also work well. Whichever method you choose, make sure the eyes are securely attached.
Step 6: Add the Nose and Mouth
For a tuxedo cat, a tiny pink, black, or dark gray nose can add a surprising amount of character.
Roll a very small amount of pink wool between your fingers and place it where the nose should be. Use a fine felting needle to secure it.
Shape the nose into a small rounded triangle. Don’t make it too large—the nose should remain a relatively small feature compared with the entire face.
For the mouth, use a fine needle to create subtle lines underneath the nose. You can also add tiny pieces of darker wool to define the mouth and chin.
Step 7: Add Whiskers for Extra Realism
Whiskers can completely change the appearance of a needle-felted cat.
You can use very fine thread, synthetic fiber, or another suitable craft material. Cut several pieces to similar lengths and carefully attach them around the muzzle.
Don’t make every whisker point in exactly the same direction. Natural whiskers spread outward with slightly different angles.
Because the whiskers are delicate, add them near the end of your project after most of the felting is finished.
Step 8: Refine the Fur Texture
Once all the major features are in place, step back and look at your cat from different angles.
If the face looks too round, add or remove wool around the cheeks. If the forehead seems too narrow, build it up gradually. If the muzzle looks too large, carefully felt it down.
Use a fine felting needle to tighten loose fibers and clean up the surface.
For a short-haired tuxedo cat, a relatively smooth surface will look best. You can leave a little texture around the cheeks and chin to imitate soft fur.
Common Mistakes When Needle Felting a Cat Head
Making the Head Too Round
A perfectly round wool ball doesn’t look much like a cat. Spend time shaping the cheeks and muzzle before adding detailed facial features.
Using Too Much Wool at Once
Small additions are much easier to control. Adding a giant piece of wool can make it difficult to achieve precise facial proportions.
Making the Face Perfectly Symmetrical
Real cats aren’t perfectly symmetrical. Slight differences in markings, cheeks, and facial details can give your needle-felted cat more personality.
Rushing the Eyes
Take your time with eye placement. Even a tiny adjustment can make the difference between a cat that looks natural and one that looks slightly off.
How to Make Your Tuxedo Cat Look More Realistic
The secret to realistic needle felting isn’t necessarily adding more details. It’s getting the proportions and transitions right.
Pay attention to the relationship between the eyes, nose, muzzle, and ears. Look at reference photos of real tuxedo cats and notice how the white markings change from one cat to another.
You can also mix different shades of wool instead of relying on one flat color. A tiny amount of gray or dark brown blended into black wool can create subtle depth, while cream or light gray can make white fur appear more natural.
Turn Your Cat Into a Handmade Keepsake
Once you finish your realistic tuxedo cat head, you can leave it as a small sculpture, attach it to a larger felted body, or turn it into a creative handmade decoration.
That’s one of the things I love most about needle felting: there isn’t just one correct way to finish a project. Your cat can be realistic, cute, slightly spooky, or completely whimsical.
If you’re building a collection of handmade wool animals, experimenting with different cat colors is also a great next step. Try a fluffy orange tabby, a gray cat, a calico, or even a tiny black cat with bright green eyes.
Final Thoughts: Take Your Time and Enjoy the Process
Learning how to needle felt a realistic tuxedo cat head takes practice, but you don’t need to create a perfect sculpture on your first attempt. Every poke of the felting needle gives you another opportunity to shape the wool and bring your little cat to life.
Start with the basic head shape, work slowly on the cheeks and muzzle, build the black-and-white markings in thin layers, and save the tiny details for the end. Most importantly, don’t be afraid of small imperfections. Handmade pieces have character precisely because they aren’t mass-produced.
So grab your wool, pick up your felting needle, and give it a try. Your next little tuxedo cat might just become your favorite needle-felted creation.